Art Supplies · Art/Crafts · Subscription Boxes

ScrawlrBox October 2019 – 50th Box!

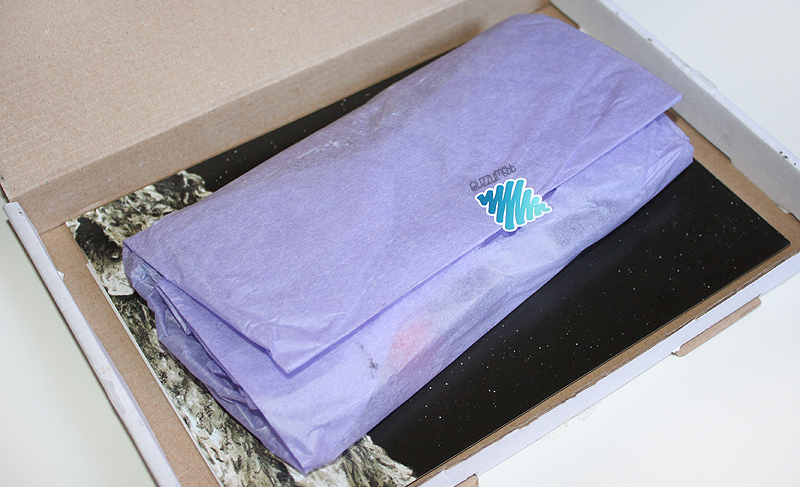
It’s been a wee while since I’ve done a post on a ScrawlrBox. I really should take a better box image… works for the purpose though. What we care about is the contents! And for some reason, my images have come out a little grainy… I’m sorry about that!

Scrawlrbox is a monthly art subscription box that dispatches around the middle of the month. It costs £15 including delivery and comes with a variety of supplies each month. You can check out my reviews of previous boxes if you’d like.

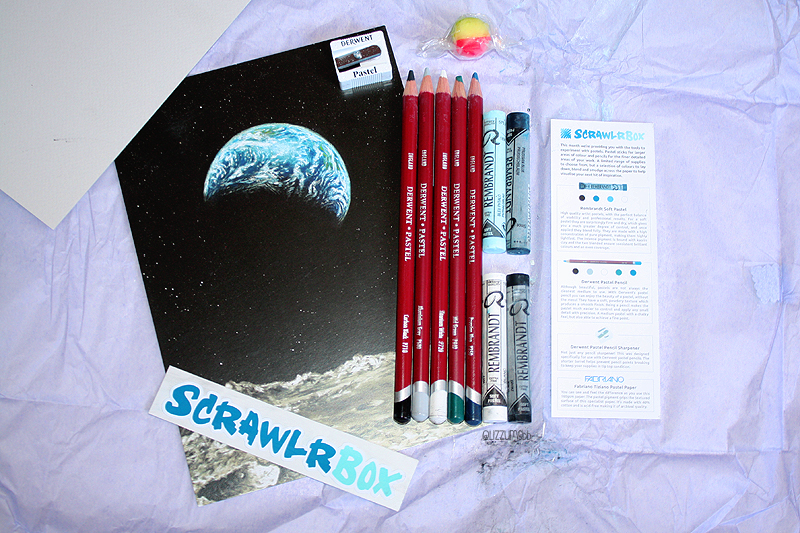
I opened my box and instantly recognised the A5 print included from the monthly featured artist; DrawingWiffWaffles! I follow her on YouTube after I looked up to see what others were doing with their boxes when I was stumped one month. I really like her work! Alongside her art were two sheets of Canson “Off the Wall” 220gsm paper, which, I know from past experience, is an excellent paper!

Every box comes with a bookmark-sized card with a list of the boxes contents and the “ScrawlrChallenge” for the month. This months challenge is “Dressed to the nines.” It also comes with a ScrawlrBox sticker which has a unique design each month and a candy – this month has Parma Violets which is pretty adorable considering the purple theme.

I was really pleased by this months offering. I was immediately excited by the first item on the list!

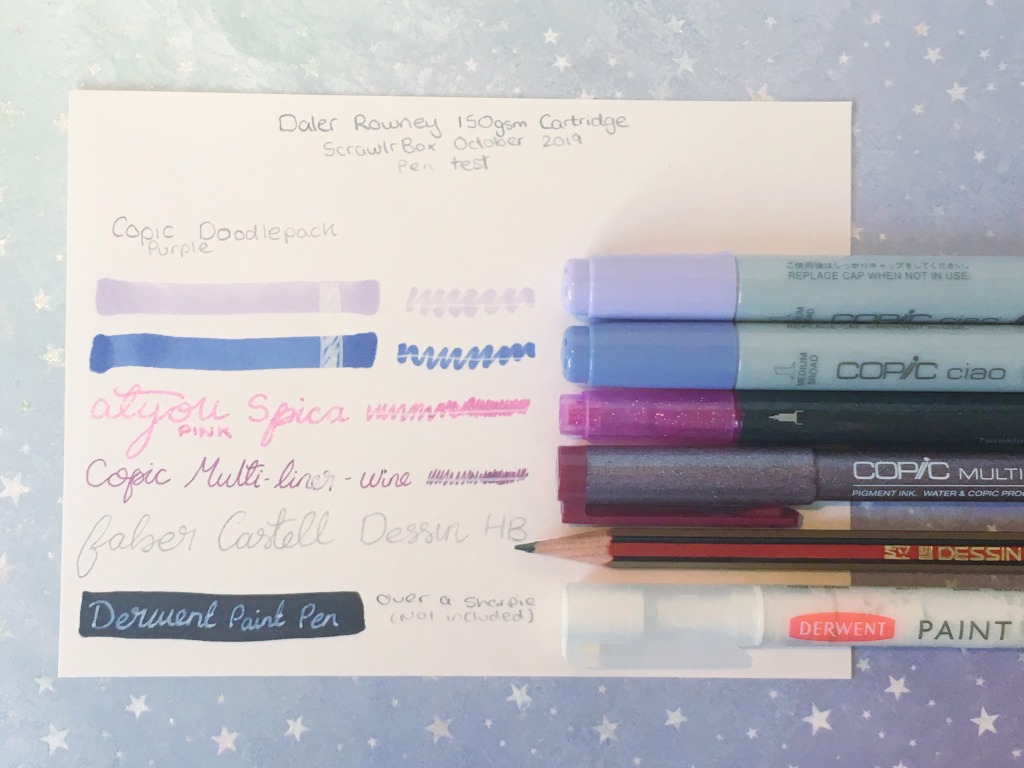
  • Copic Purple Doodle Pack – I was so excited to see this, even though I already own one of the colours. I really like little sets like this. Containing two Copic Ciao markers in the colours Mauve Shadow (BV00) and Blue Berry (BV04), Atyou Spica Glitter pen in Pink and a Copic Multiliner 0.3mm in Wine. Copic markers are alcohol based and can be blended together for a variety of tones and effects. They’re really fun, but they do feather and bleed on a lot of papers. The multiliner is just a wine coloured fineliner and is pretty great, it goes nicely with the other products. I don’t really rate the Atyou Spica Glitter pen – not a fan of the nib, but it is a nice touch of sparkle without being too heavy. I did tests of all of the products which I’ll show later in this post, but I can’t capture the glitter.
  • Faber Castell Dessin Pencil (HB) – It’s a HB pencil. There isn’t a whole lot to say about it. It feels sturdy and the lead doesn’t feel fragile.
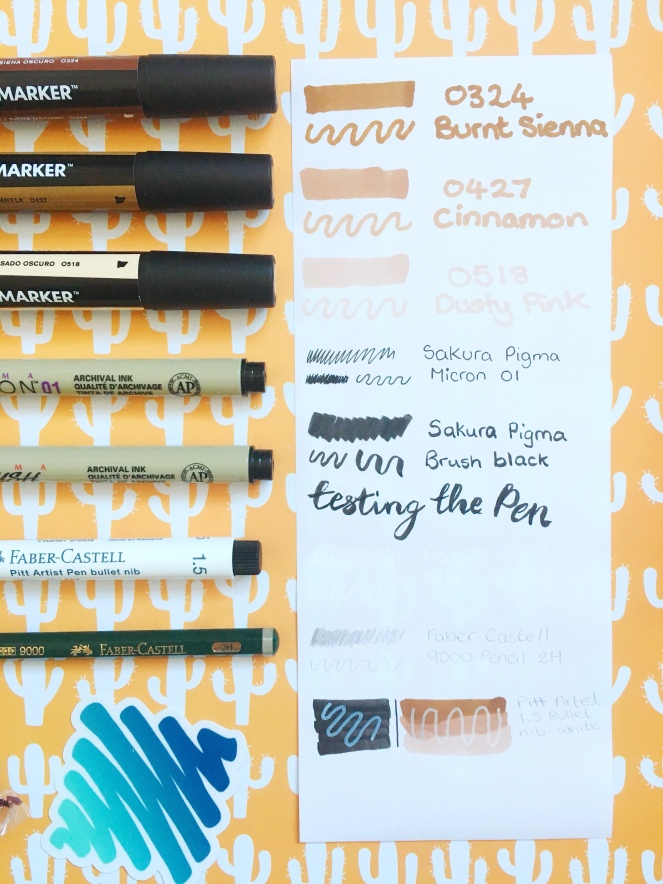
  • Derwent Paint Pen (White) – Tested below over the top of black Sharpie as it won’t really show on the off-white paper very well. I also tried it over all of the other items. I have other Derwent Grafik paint pens, so I was familiar with this type of pen, but white pens are always handy for details. While the ink is wet, you can add water to them and dilute it and use it a little like paint, but it’s permanent once it’s dry. It worked well over the other mediums, but wasn’t entirely opaque, but you can wait for it to dry and go over it for better coverage.
  • Lyra Kneadable Eraser – These things are so handy. I don’t think it matches the other products in the box, but I know kneadable erasers are a preference of the featured artist and feel like that may be why they chose to include this. I’m not complaining. it comes in its own little box to keep it in, which is really cool as most of the time, this type of eraser doesn’t have reuseable packaging. It’s pretty firm but easily malleable and I personally quite like using these, plus it means no bits of eraser everywhere.
  • Canson “The Wall” 220gsm Paper – This paper isn’t the heaviest weight but despite that, it really handles solvent based markers very well. It has a coating that means the alcohol markers don’t really bleed or feather and it can handle quite a lot. I’ve used the paper before but I’m not too heavy with markers generally, so I haven’t really put it through it’s paces to test the claim – but apparently, it can easily handle double-sided use.

The last item in the box, that I didn’t mention above, is a special item to celebrate this being their 50th box. How cool is that? It’s a little ScrawlrBox pin and I love it. I was so pleasantly surprised to find this alongside this months sticker – still a big fan of how they upped their sticker game about a year and a half ago! I’m so pleased to see this box enjoying such success. I’ve been subscribed for quite a while now and while some boxes aren’t always for me, it’s always a fun experience. I do enjoy sharing my thoughts on them. While I don’t always write a blog post, I do always tweet my thoughts about the boxes when they come through!

All in all, I was really pleased with this box. All of the supplies will be utilised and so I’m really happy about that. I don’t think I’ll end up doing this months challenge if I’m honest – I really struggle with coming up with things for them but I always keep the cards for future inspiration!

Here’s to many more boxes of surprise art supplies!

Art Supplies · Art/Crafts · Subscription Boxes · Uncategorized

ScrawlrBox January 2019

I bet you guys forgot that this isn’t just a bookish blog eh. Sorry about that… I just get caught up sometimes. Books are a magical land. Today is related to one of my other passions – art!

I have written about ScrawlrBox in the past (and used the above image before – oops! I just couldn’t get a box photo that I really liked) and I’ve meant to write more posts about it since my last, but instead, I’ve not managed more than mini-reviews on social media. I’d even taken all the photos for one previously (and I was really pleased with them!) but never got around to posting. I’ve included a couple of them below anyways so that you can glimpse some other boxes – it seems like a waste to not use the photos. It also means you wont see spoilers of this months boxes contents until after the jump. This months box was late to despatch and mine literally arrived earlier on today.

So, what is ScrawlrBox? ScrawlrBox is a monthly subscription box of art supplies which ships around the middle of the month (usually – sometimes there are supplier issues like this month, but they do email and let you know if there’s a delay). The box is small so it fits straight through your letterbox, meaning you don’t have to worry about any missed packages. It costs £15 a month including UK shipping via Royal Mail 48 hour. They do ship internationally for additional cost.

The boxes have a fairly standard “format”. You get an a5 art print – this one is by Giobi, some sheets of paper, a sticker, some tissue paper-wrapped art supplies, a “candy” and the “menu” detailing the boxes contents. The “branding” within the box is significantly better since I last blogged about them. The changes are subtle but do have a significant impact on the experience.

Sorry for the glaringly bright and over saturated photo..it’s so…yellow. The sun was playing hokey pokey. Ha. But anyway. These are the contents of this months box.

  • Winsor & Newton Promarkers – I got three of these in the shades O324 Burnt Sienna, O427 Cinnamon ando518 Dusky Pink. These are alcohol based, solvent markers with twin nibs. One end is a chisel nib and the other end is a bullet nib. I have a fair few of these markers as well as their sister Brushmarkers which are identical, just a brush nib instead of a bullet nib. They have great vibrancy, blend well and the ink dispersal is consistent for good coverage provided your pen isn’t running out. You can layer them for a darker tone.
  • Sakura Pigma Micron 01 – This is a very fine nib fineliner with archival ink. It handles solvent markers on top of it incredibly well. I have a bunch of these fineliners including one of this size, but I very rarely use it. I’m a bit brutal with how hard I press and while the pen doesn’t break, I do end up damaging them and I personally prefer a wider line.
  • Sakura Pigma Brush Pen in Black – Same as the micron, this pen has archival quality, pigment based ink but instead of the fine nib, it has a flexible brush tip which allows varying line widths. The brush tip is soft so it can be difficult to be light handed enough to achieve a finer line, I have just discovered. I’m not new to brush pens, but this is a tool I’ve never used before.
  • Faber-Castell Pitt Artist Pen 1.5 – This Pitt pen is a variant on the usual ones you see in so far as it has a wider nib in the bullet style. I got the colour White. As opposed to a brush or fineliner type. I’ve used the later type Pitt Artist pens before, but this is my first experience with the former. It has decent opacity and is layerable for a more opaque effect and is permanant once dry.
  • Faber-Castel 9000 Pencil – I got this pencil in the 2H variant. It’s a pencil. I haven’t got an essay to write about this supply. I prefer softer pencils so I probably wont use this much, but it feels nice in the hand and pretty sturdy.
  • Canaletto 160gsm Liscia – I got two sheets of this paper. It is 20% cotton, and acid-free. It also contains Calcium Carbonate for PH neutrality. It’s fairly smooth; to me, it feels like pretty typical cartridge paper which is an interesting inclusion due to the supplies being alcohol based markers. It’s slightly off-white in tone.

On the “menu” card, ScrawlrBox always issue you an art prompt. This months one was “Growing Up”. In all honesty, I never usually bother, but this time, I decided I would give it a go. Ideally, you’re meant to only use the supplies within the box, but that was too bland for me, so I used some of my other Winsor & Newton markers, and a couple of other items from previous scrawlrboxes to at least try and keep in line with the box itself. I used a StyleFile alcohol marker in NG9 which came in a previous box last year and a pink Staedtler Ergosoft coloured pencil which came in the box in.. November, I believe.

Ta-da! I’m in a plant pot. Growing up. Geddit? Ha. Haha. Ha… If you’re interested, I used quite a few additional markers for small things, such as the pink for my tongue. The colours I used are as follows (and items in italics were not in the box, I did use every supply that came in the box though). I used to be so scared of sharing my artwork publicly. I had planned on doing a round-up of my inktober pieces each week on here last October, but I chickened out… welp.

Markers: O518 Dusky Pink, O427 Cinnamon, 0324 Burnt Sienna, Y129 BRUSH Satin (for hair tips), M727 Rose Pink (for tongue), B736 BRUSH China Blue (for clothing), 0177 Bright Orange (layered with Cinnamon for the plant pot to make a terracotta shade), O124 Walnut + O225 Henna (for the soil, plus StyleFile NG9 Neutral Grey 9), B318 BRUSH Cloud Blue (for the background).

Other: Sakura Pigma Micron 01, Sakura Pigma Brush Black, Staedtler Ergosoft Pink coloured pencil (for cheek blush), Faber-Castell Pitt Artist Pen 1.5 White (for the highlight lines), and of course, the pencil to sketch it out originally and I used a derwent eraser. 

Woo. And that’s the lot. I really liked this months box. Humanoid things aren’t really in my comfort zone and I was pretty scared of the neutral colours in the box, but I’m quite pleased with the piece I came up with even if I technically cheated, but, it was still a challenge and still out of my comfort zone and that’s what counts, right? RIGHT? I really needed some colour there. Haha.

If you’re interested in signing up or finding out more, you can go to their website to sign up to ScrawlrBox.

Beauty · DIY/Tutorials · home · nails · skincare · Uncategorized

Easy DIY: Nail Oil

diy_nail_oil

Hi guys!

My previous blog was full of a lot of nail posts. A lot of people requested I did something nail-care related, so I thought I’d share my very simple DIY nail oil with you which is also great on face and body too! It’s fast absorbing, results are visible after a very short period of usage and it doesn’t leave you feeling greasy! On top of that, it’s crazy easy, so anyone can whip it up; and you only need three things. It also makes a great gift.

nail_oil

The things you will need are:

  • Jojoba Oil (Cold pressed is best!)
  • Vitamin E oil (or gel, as long as it’s pure)
  • Empty amber glass pipette bottle
  • Essential Oil fragrance eg Lavender Oil (Optional)

You don’t have to use amber bottles, but they help provide UV protection for the contents, so they will help avoid any deterioration. Blue bottles also work too. Generally, it’s better to just keep anything with essential oils in a dark glass bottle.

First of all, remove the lid from your empty amber glass bottle and put it to one side. It should be pretty obvious, but this is where your nail oil will be going.

Next, add the vitamin E oil/gel. Gel will help the oil have a thicker consistency, but it’s not as easy to obtain – nor as cheap (in my experience) so here we’re just using oil. You need to fill the bottle up 1/5th to 1/4 with the vitamin E oil. If your hands are particularly ragged, go for the quarter.

Next, fill up the bottle to half way with the Jojoba oil. Replace the lid and roll the bottle and invert it a few times (as opposed to shaking it) so the oils combine. Remove the lid and fill up almost the rest of the way – you need to make sure there is enough room for the pipette and your fragrance oil if you choose to add any; personally, I don’t bother.

Optional Step: Add a couple of drops of your fragrance essential oil if you choose too. Lavender also has anti-bacterial properties. You can even add a good amount of tea tree oil if you want the nail oil for your toenails or acne prone skin. Again, this is optional.

Lastly, put the lid on your bottle, hopefully you’ve not over-filled it! Roll it around to help combine the oils.

nail_care

That’s it! Easy peasy. I didn’t even really need to give that much instruction, but I wanted to make sure it was clear. You can use this oil as often as you like. It’s super nourishing and softening.

If you have any hang nails, gently clip them off as closely as you can – don’t rip them off, you’ll damage your skin! Massage in oil as liberally as you like, especially in to the nail bed and cuticles and it should help stave off any future hang nails. I also use this stuff on my face to fight the punishing cold wind as part of my skin care routine (apply prior to moisturising). I put a small amount on my nails and rub it right in to the base of my nails, soaking the cuticles and after, I rub the excess in to my hands. They’re so soft – I haven’t had a hang nail or any nail splitting or peeling in weeks.

I hope this is useful to you! Feel free to share it with anyone whose hands could use some TLC. You could even make some nice labels and whip some up for a gift this festive season!

Art Supplies · Art/Crafts · DIY/Tutorials · Uncategorized

DIY: Washi Duck Tape tabs

ducktape_washi

I’m awful at the whole regular blogging thing. Sorry not sorry. I promised myself I wouldn’t force anything when it came to my new blog, that includes imposing a schedule on myself. I’ve got plenty to write about, lots more to post, but I’m only going to do it when I feel up to it. In the meantime, I have lots of notes and thoughts and stuff that I keep in a notebook. It’s really helpful to be able to mark or tab things to help organise my thoughts, and while I use a notebook with two ribbon markers and have an index, it’s not quite enough for me. So what do I do? Washi tape tabs!

stationery

This stuff is really simple guys, and I absolutely love it. Anyone who follows me on twitter will likely know that I am addicted to duck tape. No, really. This is basically me. (not to scale, both horizontally and vertically.)

washi_man

Well, a while back, I saw Hobbycraft started stocking duck brand washi tape, so I had to get some. Washi tape is endlessly useful, especially if you like to be organised, but today, I’m gonna share a few ways I use the stuff in my notebook to help sort of “file” my ideas. I used to hate the idea of working on several things in one notebook and fear the blank page, but thanks to numbered pages, an index and washi page tabs, it’s no longer an issue for me.. mostly.

washi_paperclips

First, I’ll start with the easiest to move/remove. Paperclips! Paperclips are great to not only hold you pages together, but make little flag markers too. Simply put a small piece of washi tape through the clip, fold it over and trim the end in to whatever shape your heart desires. Personally, I cut mine to look kinda like ribbons. So useful!

ducktape_washi_tabs

Next are tabs for your actual notebook. Like I said before; these are all super easy! Just cut a piece of washi tape and attach it to your page, fold it over either just on itself or to the back side of the page. Personally, I choose to do it to the back side of the page, it feels sturdier when flipping to it.

washi_page

Lastly, two types of page edging! This is great if you want to mark pages or sections, but don’t want anything sticking out of your notebook. Simply put a length of washi tape along the page and fold it over. Or, as shown above, you can do a smaller length piece.

All of these are nice and easy, simple and effective. What I love is that they’re also really easy to remove and replace or whatever you need to do. You can also write on them, use the tape to cover mistakes, wrap cords, tag stuff, wrap boring stationery and so much more.

I hope some of you may find this helpful! Do you already use Washi tape? What do you use it for? I’d love to hear your uses for it!


*Some of the Duck Tape Washi Tapes featured in this post were gifted to me from the brand*

Art Supplies · Art/Crafts · Subscription Boxes · Uncategorized

ScrawlrBox (March Contents)

scrawlrbox

ScrawlrBox is a monthly art supply subscription box which I have grown to love. The first time I ever got the box, admittedly, I didn’t rate it and immediately unsubscribed. However, I kept an eye on the boxes since then and decided to give it another go as every other box I had seen, I thought looked really good. Since re-subscribing, ScrawlrBox has failed to disappoint, in so far as products go at least.

scrawlrbox_packaging

As you can see, the packaging is less than exciting, and for March’s box, it was inadequate; more on that in a moment.
One of the upsides about this box, is that it’s a slim box that fits perfectly through the letterbox, so no waiting around for the postie. Each box’s contents are wrapped in tissue paper with a sticker. As for the contents themselves, well, every box has the same sort of format. You get a few art supplies, a print with some info about the artist on the reverse, a couple of sheets of paper that are perfect to use with the tools you received, a scrawlrbox sticker, a sweet treat and lastly, a bookmark sized card with a run down of what you received with an art prompt on the reverse.

scrawlrbox_march

All of these goodies cost £15, including delivery. I’ve explained the packaging to you, and as the image shows, the art tools sent for March were chalk pastels. Usually the tools are pens and markers an such so no worries on those, but the packaging resulted in a lot of people receiving dusty and broken art supplies. Mine were dusty, but that’s no issue, I cleaned them up for the photograph and only one pastel was broken and still fine to use. No big deal, but others received boxes in a worse state. Thankfully, the company took this feedback on board, at least appear so. The box received since then was packaged in the same way, but it was products that would ensure just fine when mailed in such a way.

If you like the look of Scrawlrbox, you can sign up, or, alternatively, they even have the option to buy previous boxes if you missed out. I’ve found it a great way to top up my supplies and try new products!

Have you ever tried ScrawlrBox or another art subscription box? I’d love to hear what you think or if you have any recommendations for other affordable art boxes!